|
Dynamometer Car 29 Update 3/12/2011
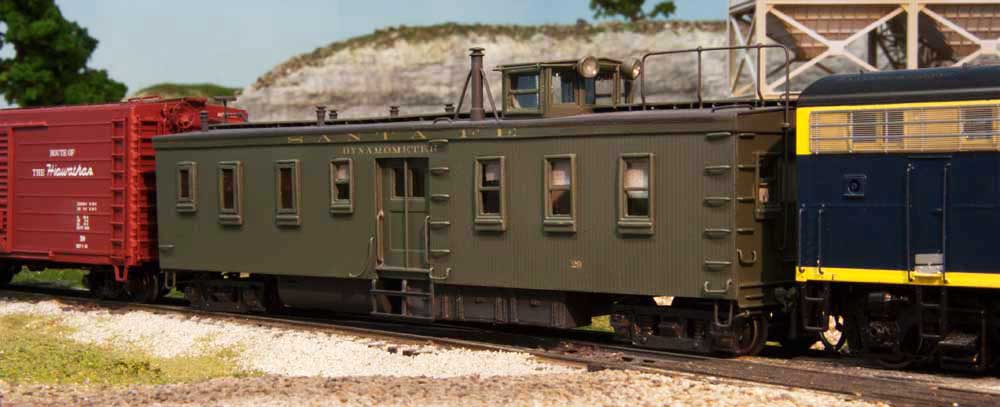
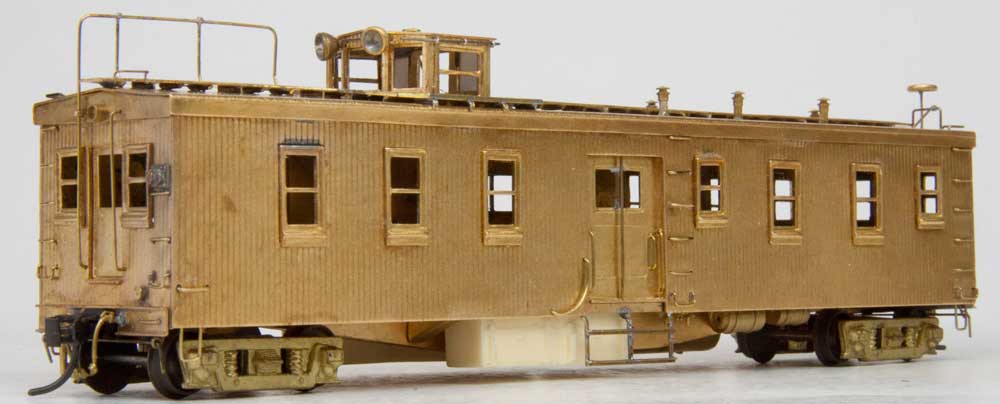
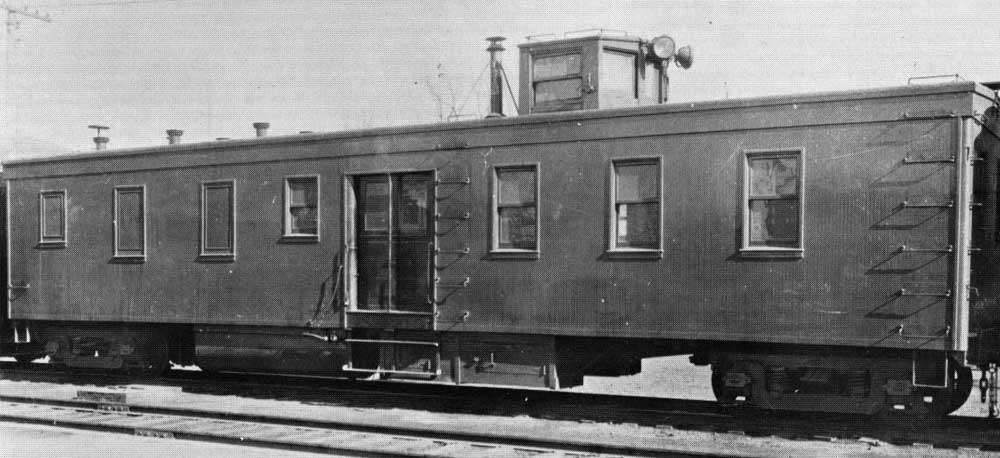
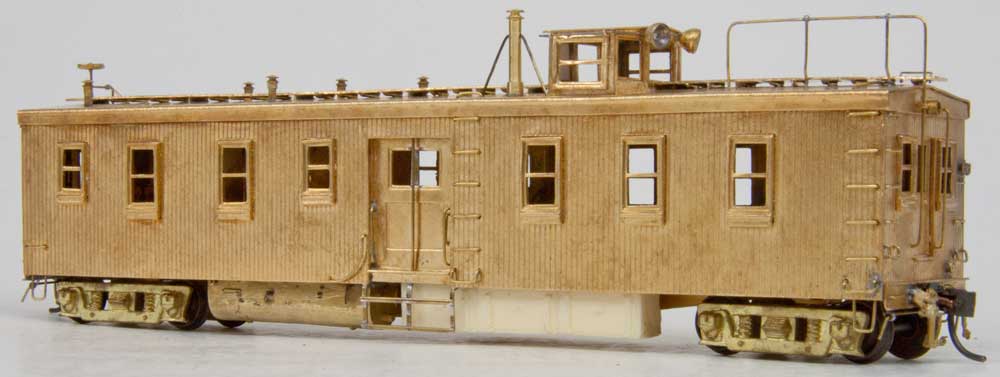
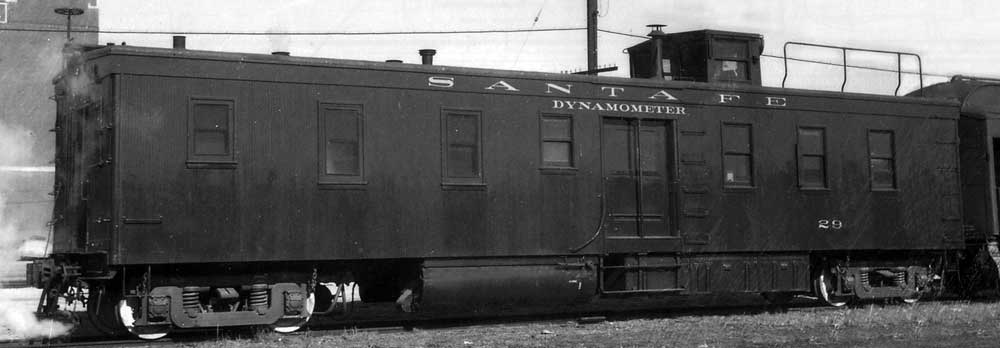
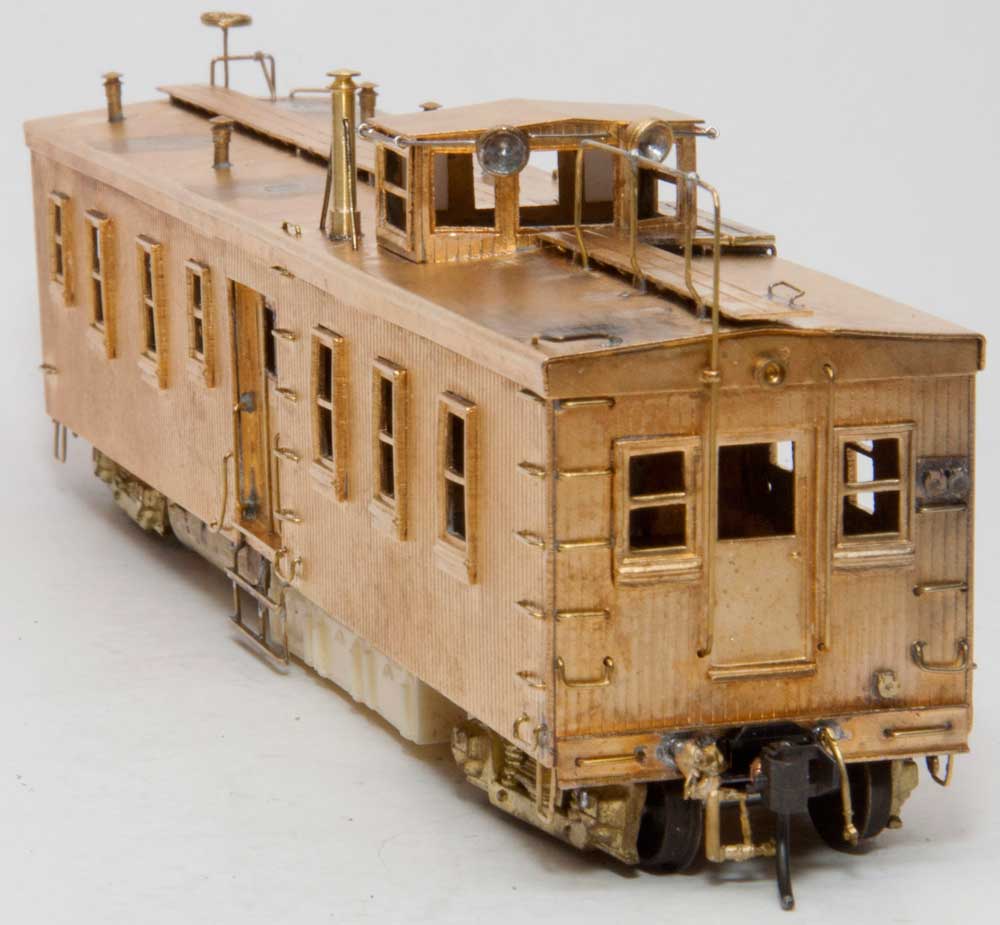
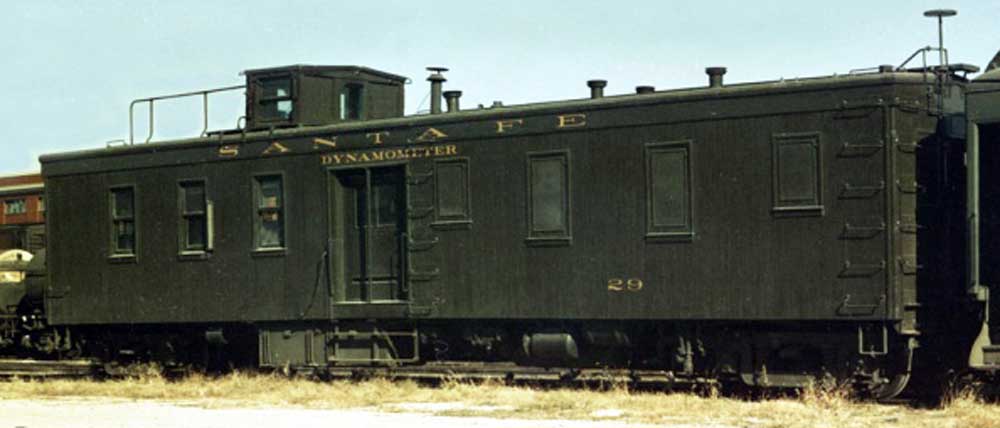
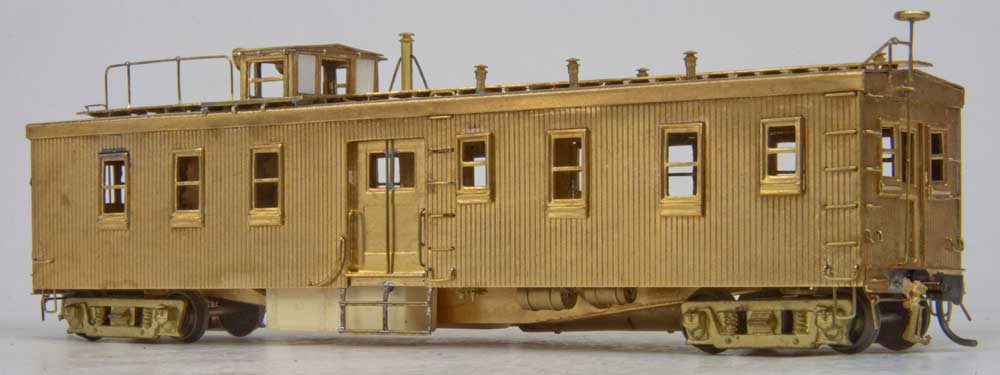
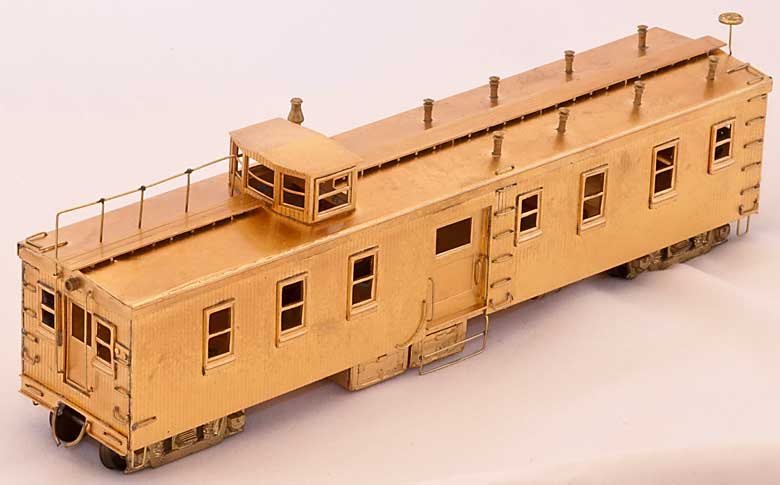
By 1910 Santa Fe had constructed car 29, a Dynamometer car used to test the proficiency of locomotives. This car was used to test just about every class of steam locomotive on the system after 1910 ending its career in 1963. Test Car 5015 replaced it in 1961. Photos show it testing the RSD-15s when delivered. This web page is the result of research to detail and correct a Hallmark brass model from the 1960s. Even as this page is being prepared, the photos continue to point out items which need further attention. (Note: click any image for an enlargement) Hallmark model photos by Paul Brown (appears second) The Front:
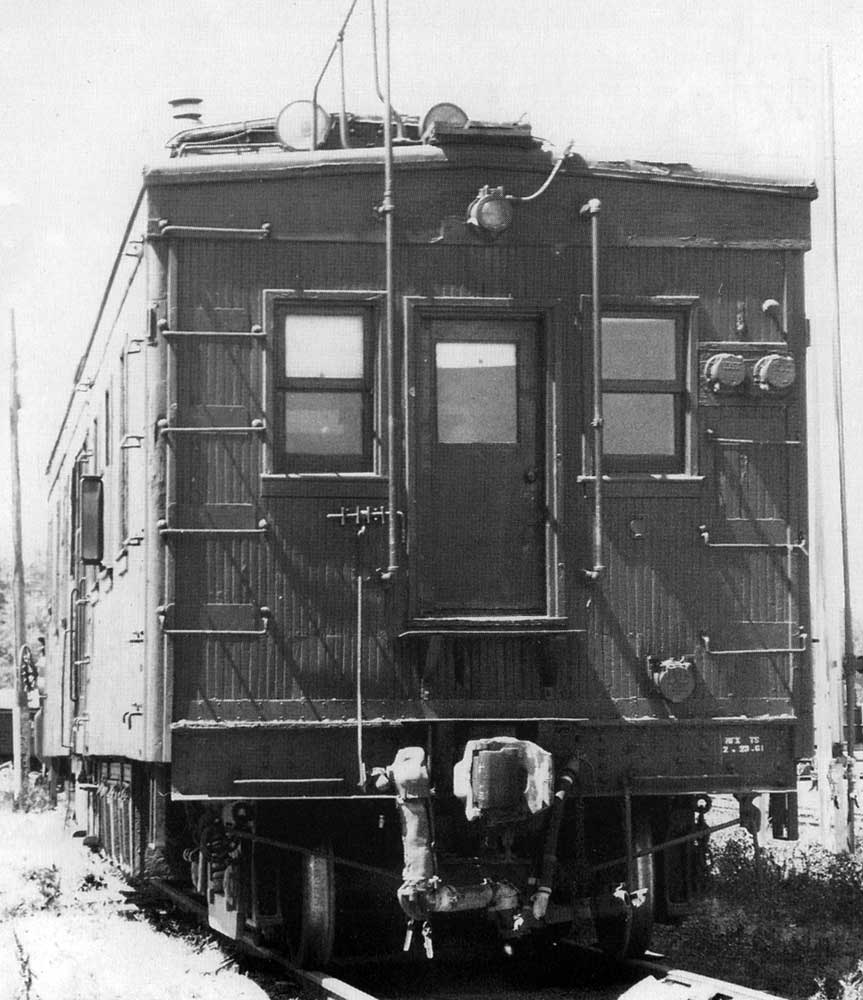
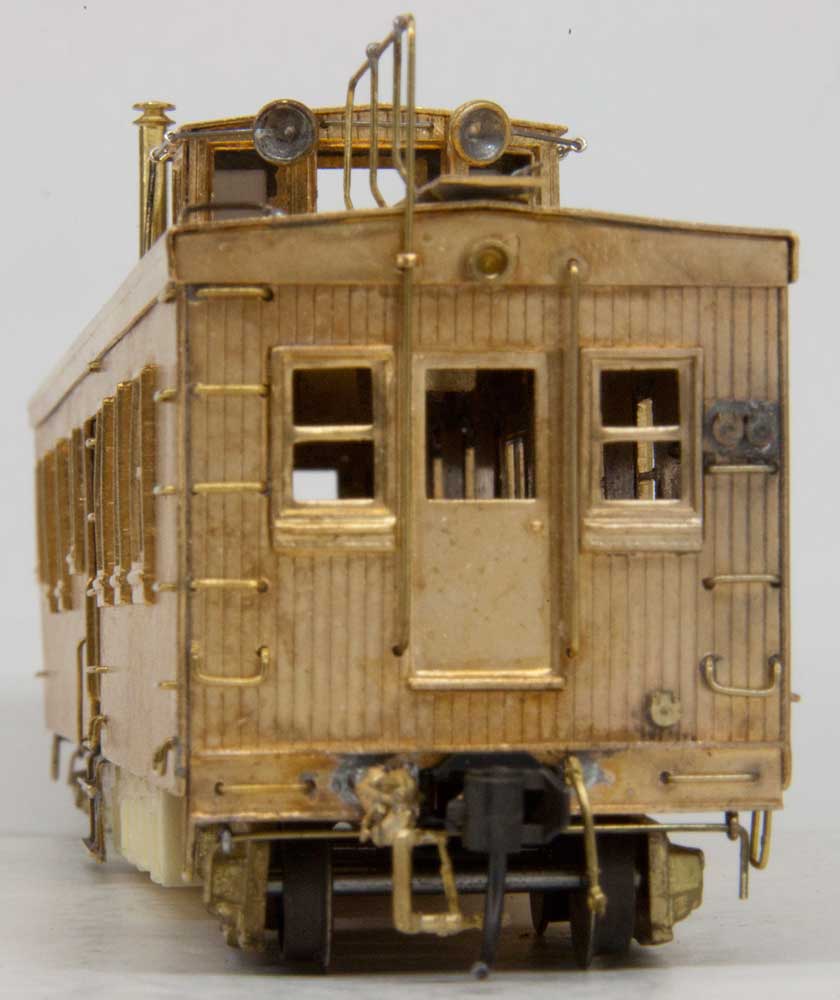
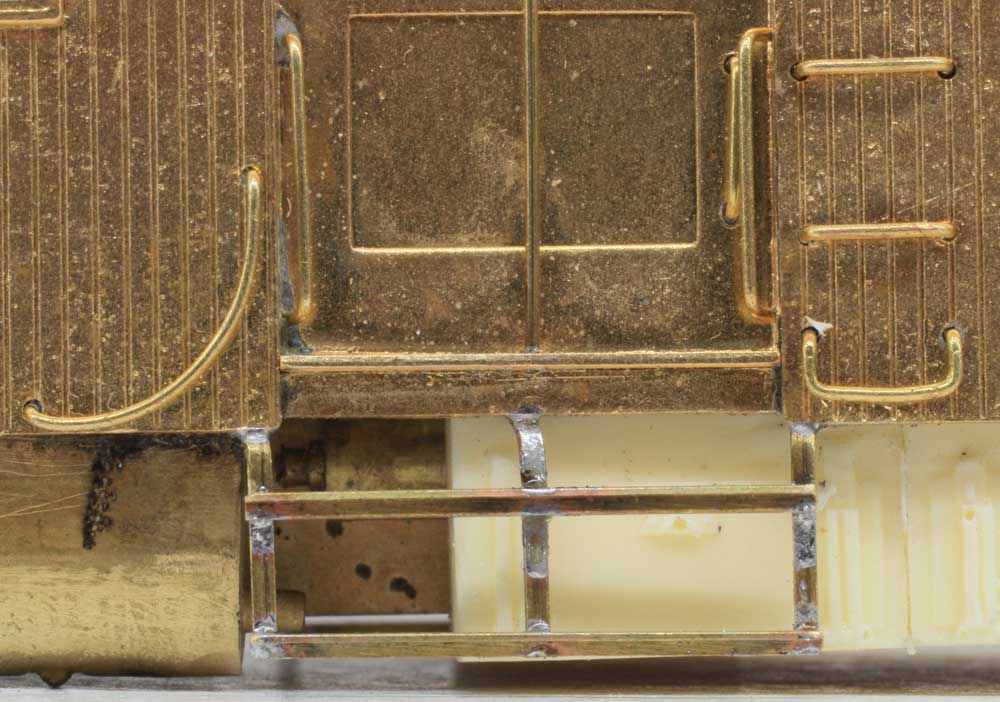
The front of the model is a fair representation. Replacement of the steam line and brake hose with Precision Scale castings greatly improves the appearance. Uncoupling bars can also be added. These were at the top of the sill and over the coupling in the early days, and below the sill and under the coupler after about 1920. The light over the door appears to be of the same design as steam locomotive rear lights and the rear lights placed on F units. Ackert Industries makes a steam tender light that could be cut down for this purpose. The twin round things on the wall by the window are MU plugs. There is also a single one on the prototype that did not get on the model. Details Associate 101507 brass ones serve as upgrades. If you try to remove the double plus on the model you will find a hole in the wall behind it. You will do better to use a small file and file down the raised areas and solder the new ones on top of them. The as built the car had no front door, but it was added by 1944. Speculation, but it may have been added when working with diesels which had back doors. To the left of the door was some sort of mechanism. I have yet to figure out what that was. It may have been on the rear of the car as well. Interior photos show curtains on the front windows in the down position. I assume all windows had curtains with the standard Santa Fe silver finish. Silver gray card stock makes good curtains. Right Side: We'll leave the roof for later, but the main item missing from right side is the pole in the middle of the door. Also the window has a vertical piece in the middle - a two pane door.
Also the step under the door is missing a center support. That entire step could be rebuilt from brass bar and angle to improve the appearance.
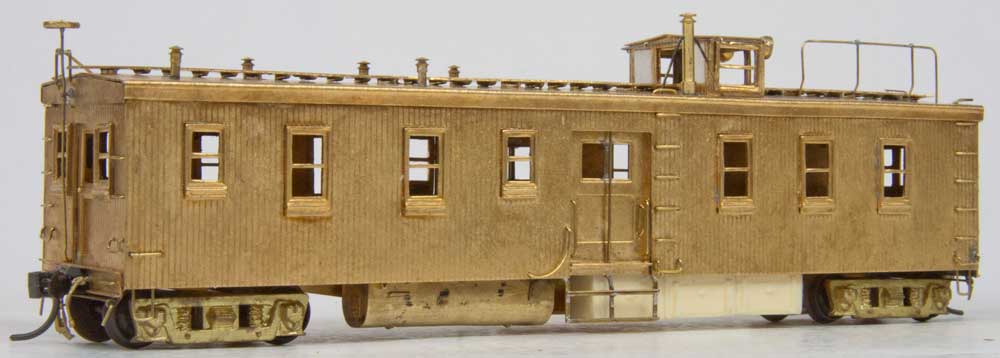
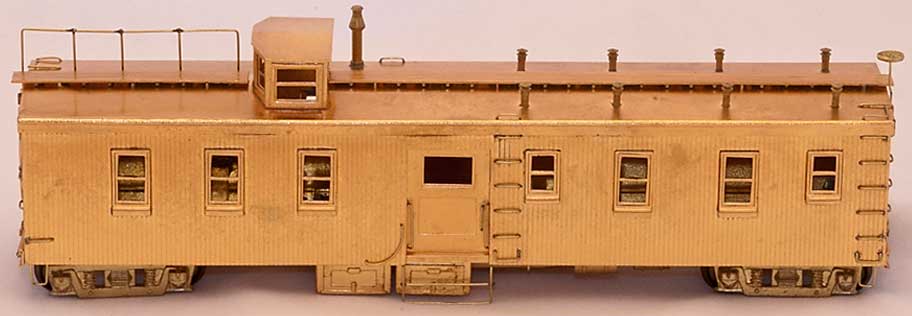
The tool boxes on the Hallmark model are nondescript brass castings which are also separated from each other. The prototype had two connected boxes which were distinctive. I know of no brass castings that will work. One option is to remove one or more boxes from the Walther's Santa Fe Heavyweight coach and use them as masters for resin casting. The ones I made began as tool boxes under an old Riverossi Heavyweight. I added the channel style hinges using Evergreen styrene. Then resin castings were made. The rear 4 windows on this side have screens on them similar to those on cabooses. I made frames from styrene 1x3 stock and glued rust colored organza material to the back to form the screen. The frames should be coach green. Left Side:
As with the right side, the left side can use the doorway center post, window divider and the extra support on the step below. A major improvement is the Pullman water tank to the rear of the door. The Hallmark model has a brass bar screwed to the floor. A Precision Scale tank is a not 100% correct, but close and is brass. The tank on the Walther's heavyweight Santa Fe coach is correct. It can be removed and a copy cast in resin. This side also needs a third tool chest (battery box?) for later years (the car originally only had two). Use the same methods used on the right side. Some photos also show a safety glass windscreen on the second window from the front to allow engineers to look out from the side. The windows on the front portion of the car appear to have no screens- they are glass. The windows on the rear where sleeping and eating took place had screens like the cabooses (see above). Rear: The rear of the car also needs quality steam and brake hoses and uncoupling bars. I found no sign of their being a brake platform on the end like would be found on a freight car. I also have not seen a clear photograph of the rear of the car. I made an assumption on my model. Since the rear portion of the car had screens on the windows - this was the living section, I assumed there were screens on the two windows as well as on the door. I therefore added screens to this area. Roof: The roof is where many changes are needed. And it is roof photos that are hard to find.
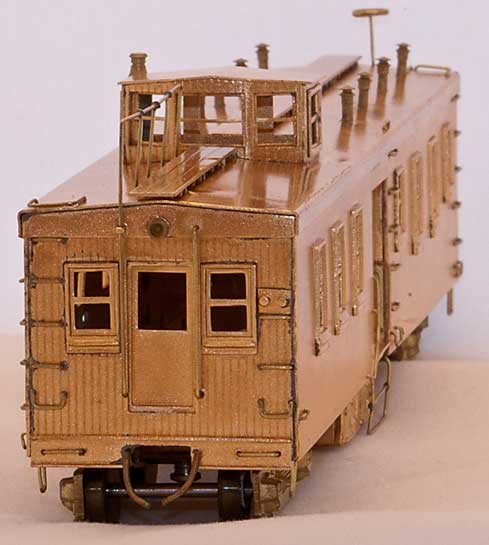
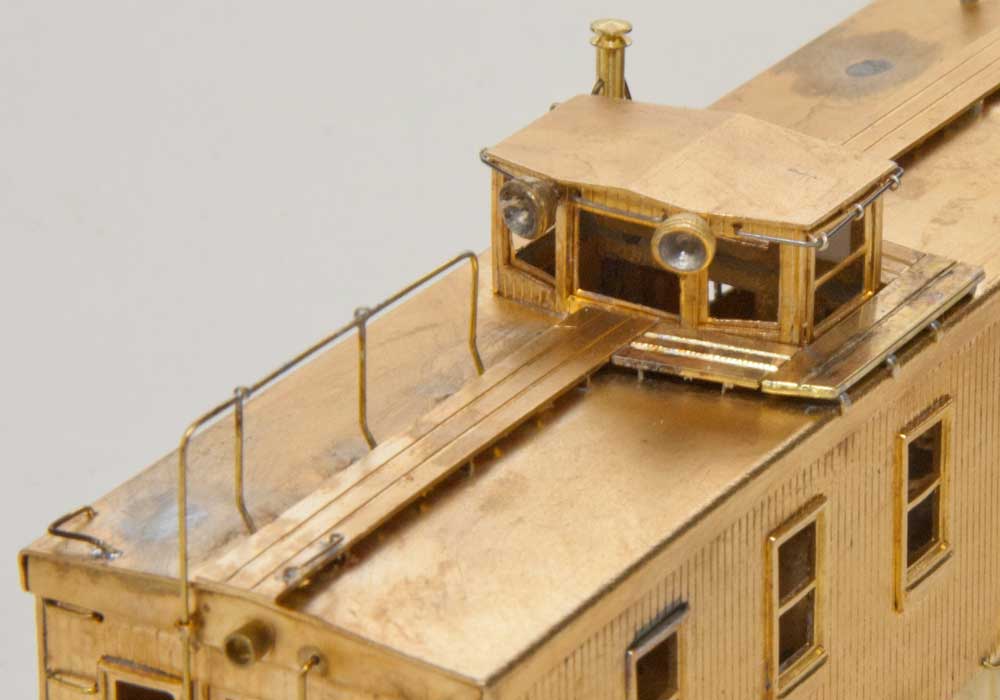
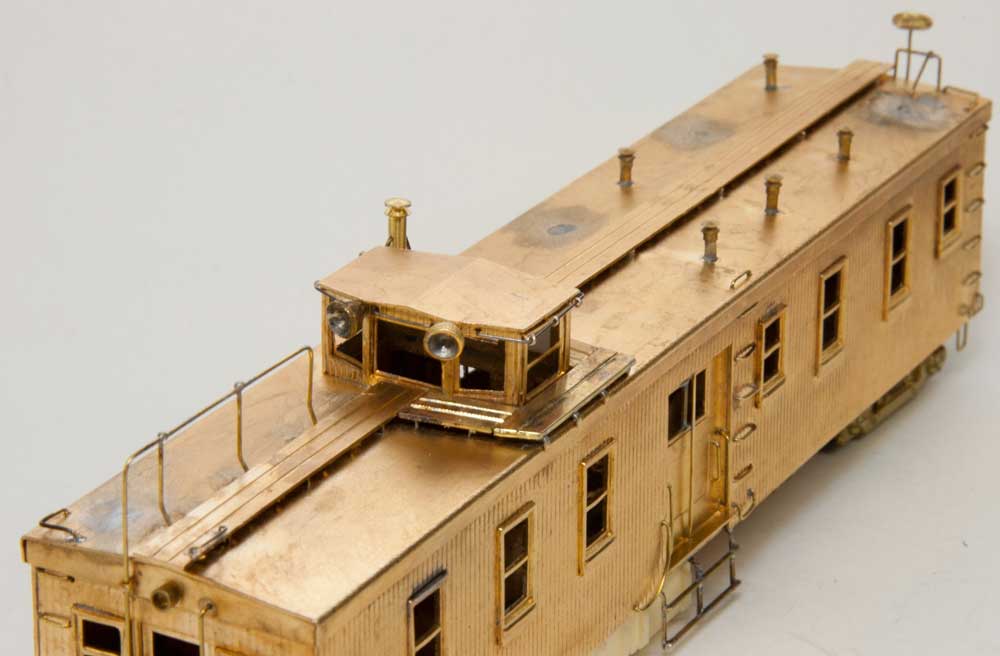
We start at the front. The walkway should have a grab on the side almost over the light. The the hand rails for the roof walk must be totally reworked. Hallmark had three mid supports instead of two and they were equally spaced. Notice also that the prototype verticals had a bend near the roof. The hand rails also did not go as far toward the cupola as in the model.
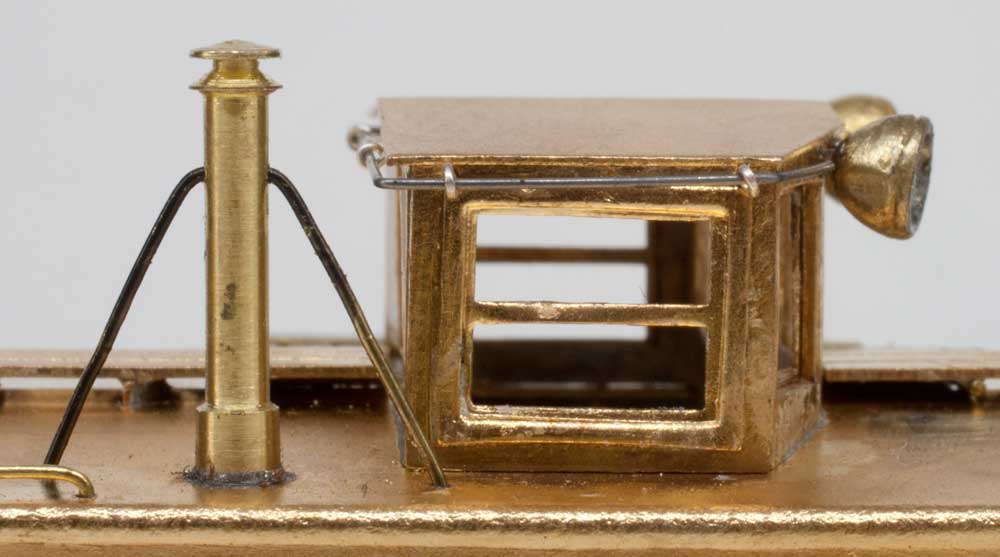
The model comes with three large front windows that appear to be double hung. The prototype was not double hung, so clip the middle piece out and file the sides smooth. Some photos seem to indicate windshield wipers over at least two if not all three of the front windows. The spot lights are a key visual point. I did not find any that were exactly correct, so had to rework the closest thing I could find. It would not be difficult to put 603 LEDs inside these if someone wanted to electrify them. I don't plan on operating my model at night.
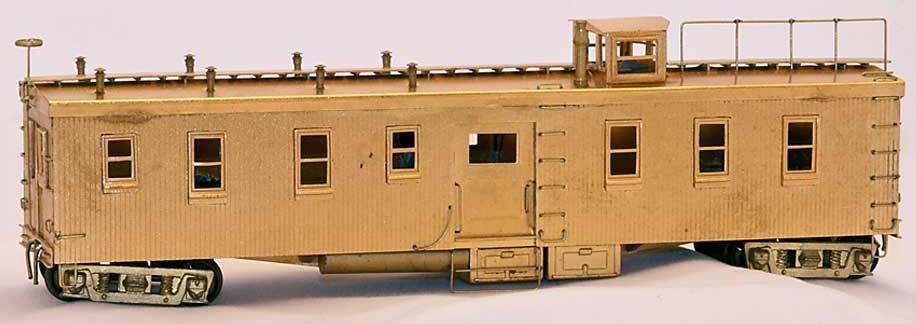
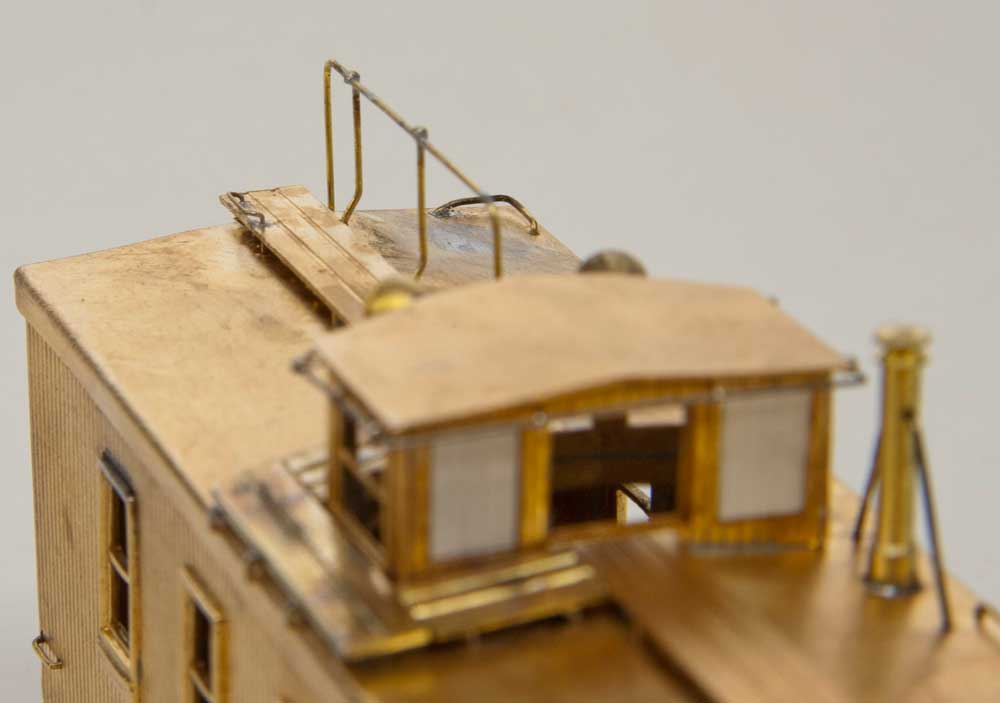
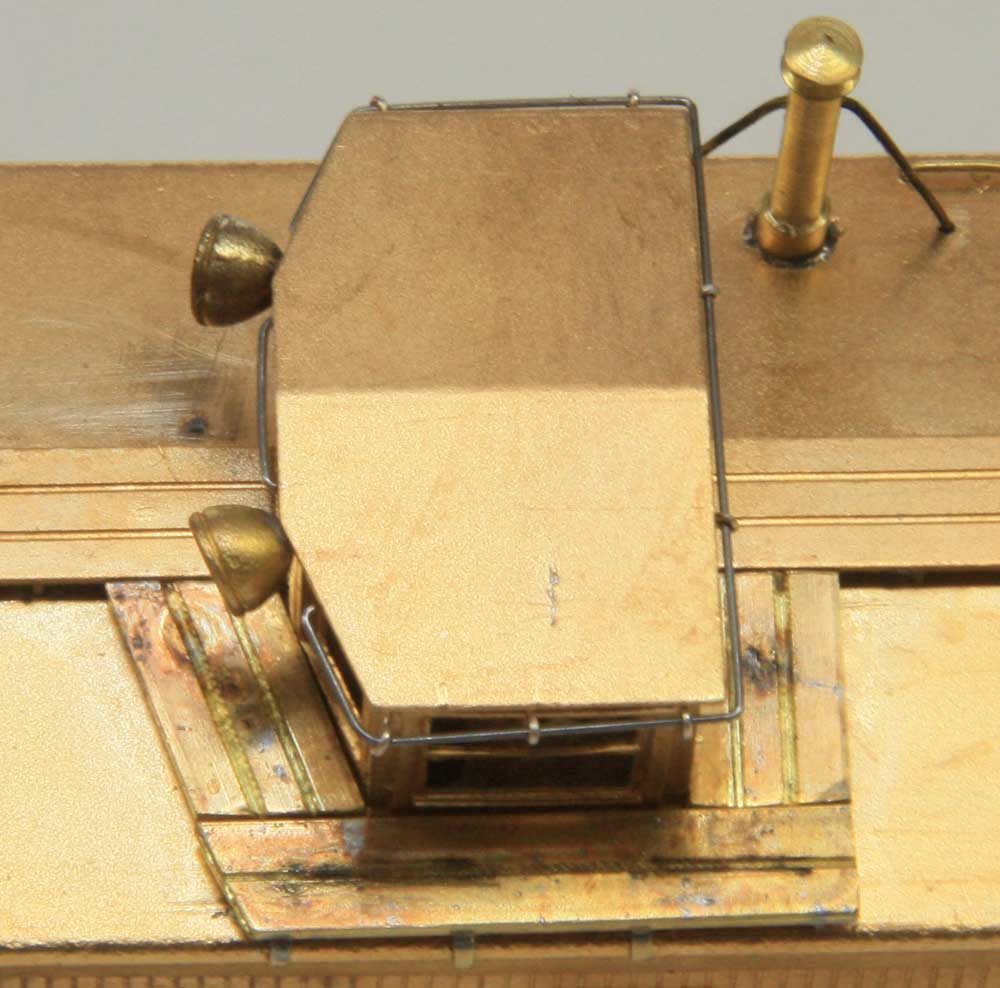
Next is the Cupola. Drawings and photos indicate that the walkway went around the right side of the cupola. Details do not indicate as much as we would like to know about that. I wanted my walkways to match the ones that came on the model, so I milled brass bar to match. These are supported on brass angle. Notice that the parallel to the side was only wide enough for two boards, not three. Examination of plans would indicate that the Hallmark model has too broad a cupola. When built, the cupola had handrails on its roof much like a caboose. However, later in life the were replaced by handrails that went around the cupola. I chose to use piano wire for my railings since they will withstand handling better than brass of equivalent size.
The above photo is the best one I could find of the rear of the cupola. The model has three windows. The prototype at least at the end of its life had only a central window. Due to the amount of heat sensitive soldering in that location, I used styrene car siding to fill the outer two windows.
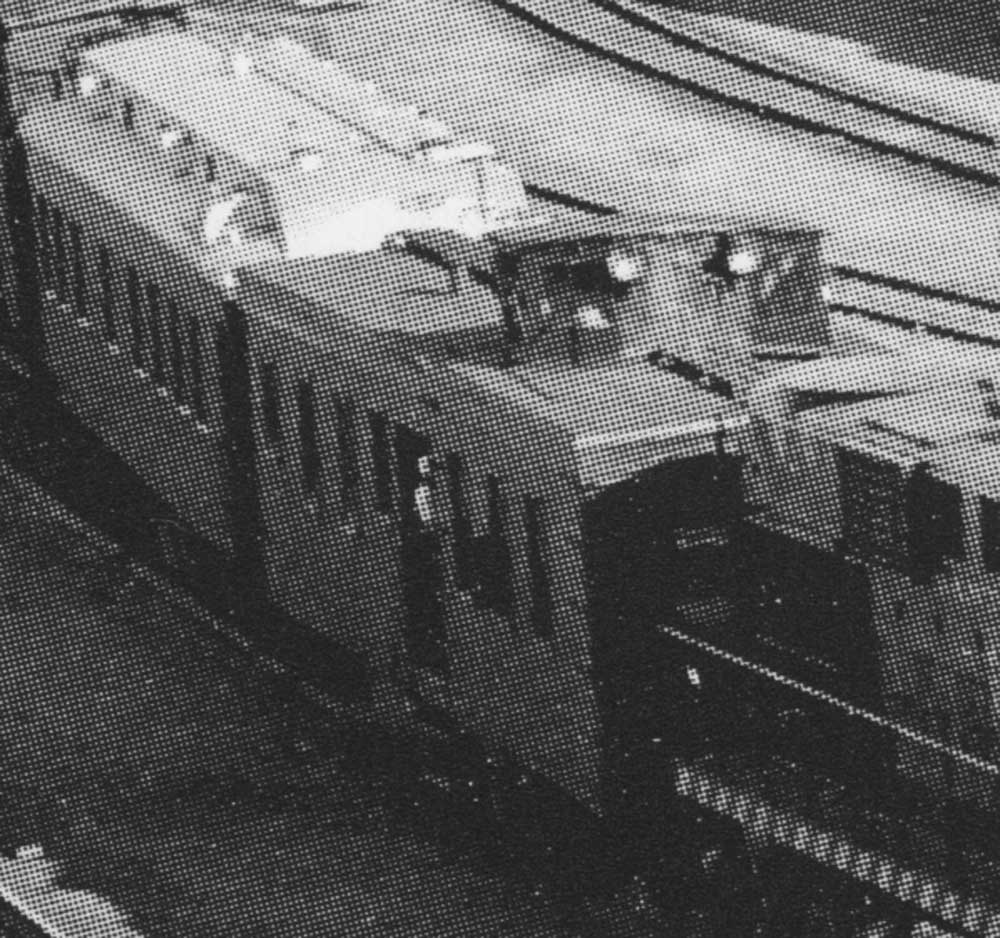
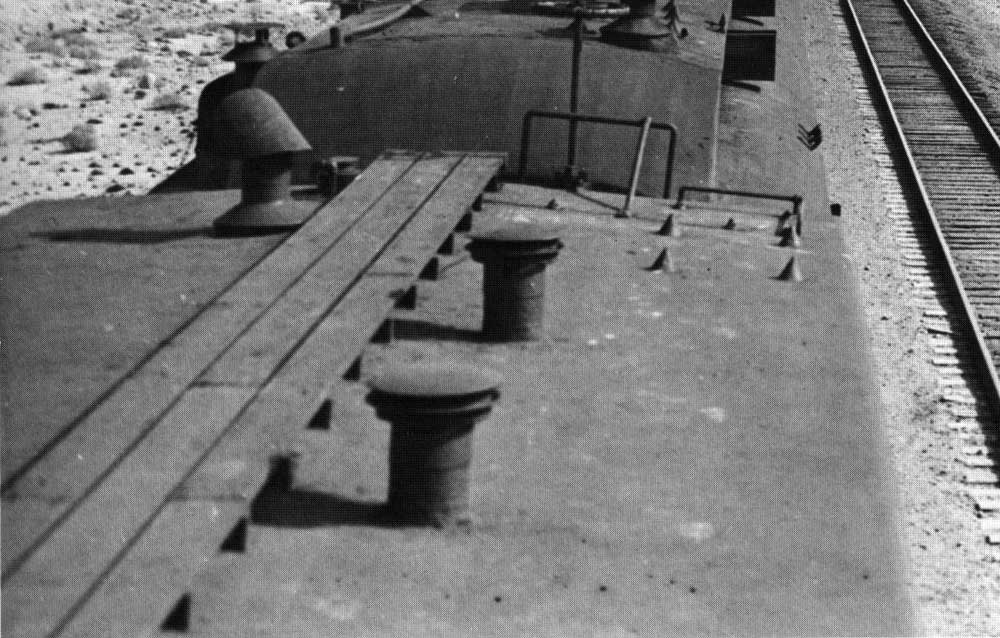
The vents on the roof present an interesting quandary. Looking at all of the photos above it is hard to know exactly which vents were present at which time. They also appear to be closer to the roof walk than those on the model. After looking at drawings and photos, I chose to remove three and leave the other 5 in place. Three are over births, one over a bath, and one over a dining area. The above photo (from 1941) shows the one over the dining area as having a wind vane on it, but other photos do not show that detail.
The smoke jack over the stove and is a poor turning. If you have a lathe, you can turn one better than the one on the model. While at it, add the support wires for it.
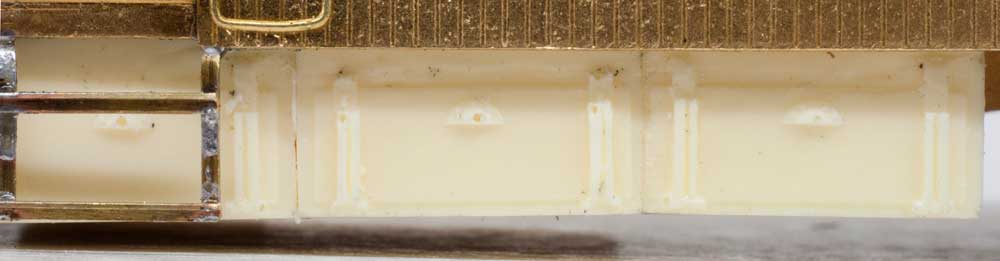
At the rear of the car roof is a protective frame for the brake wheel. It shows up in all photos and is easily constructed. A daintier brake wheel is desired, but the one on the car is Precision Scale. There is also a wire of unknown origin by the corner grab at the rear and at the front of the roof. It does not show up on any photo that I have seen, so I removed it. Underbody:
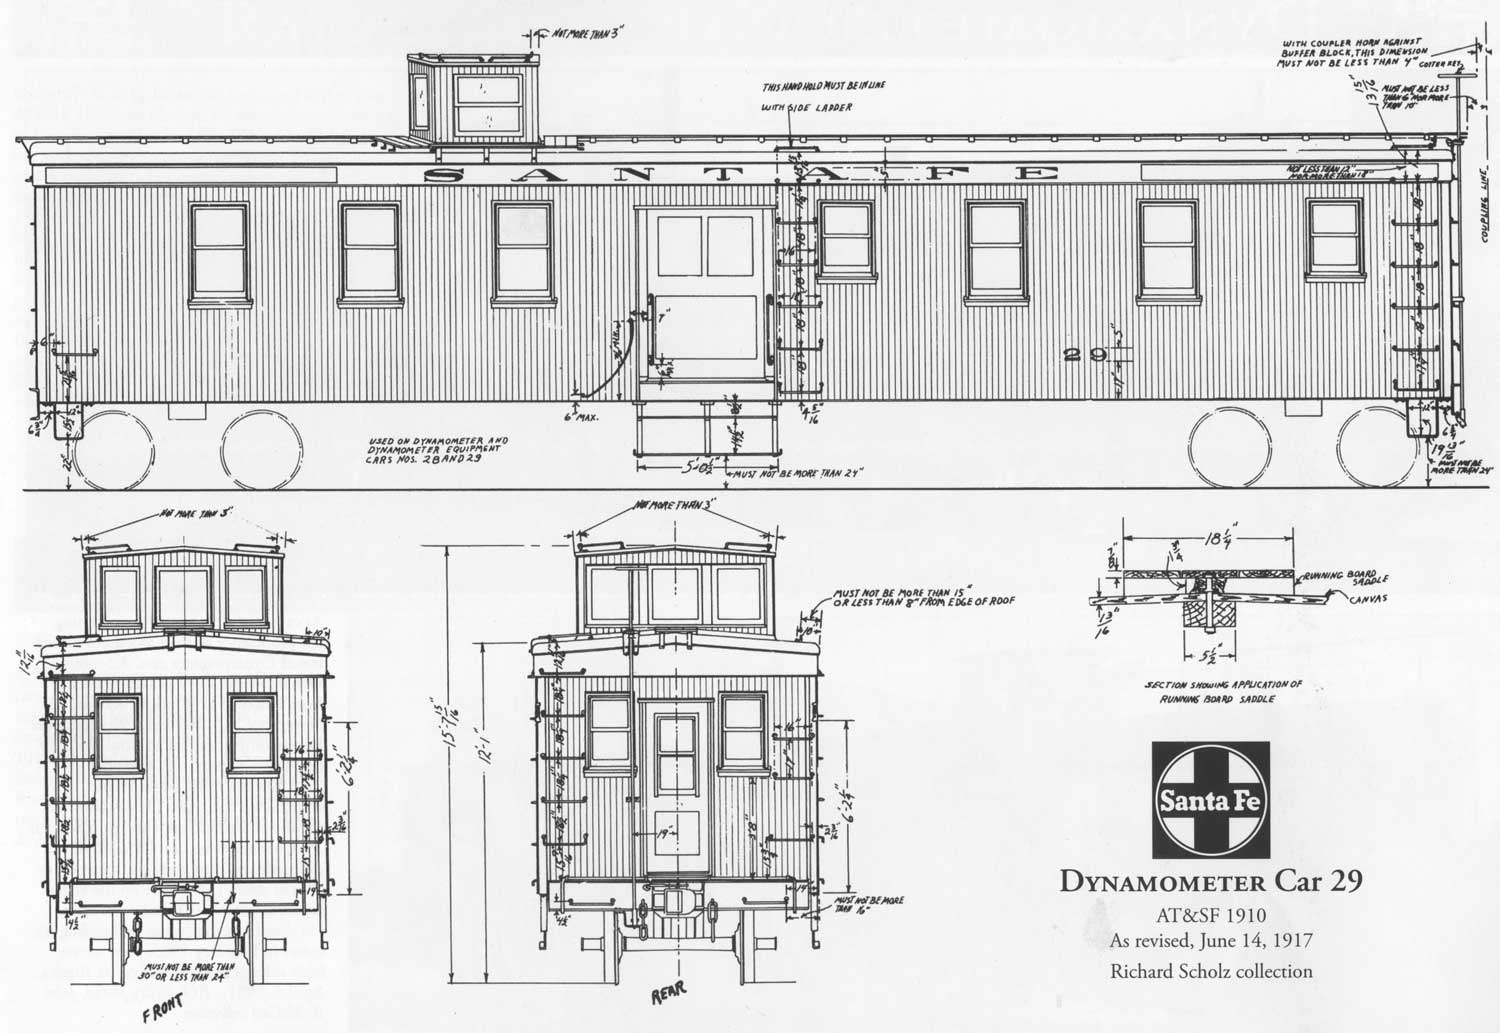
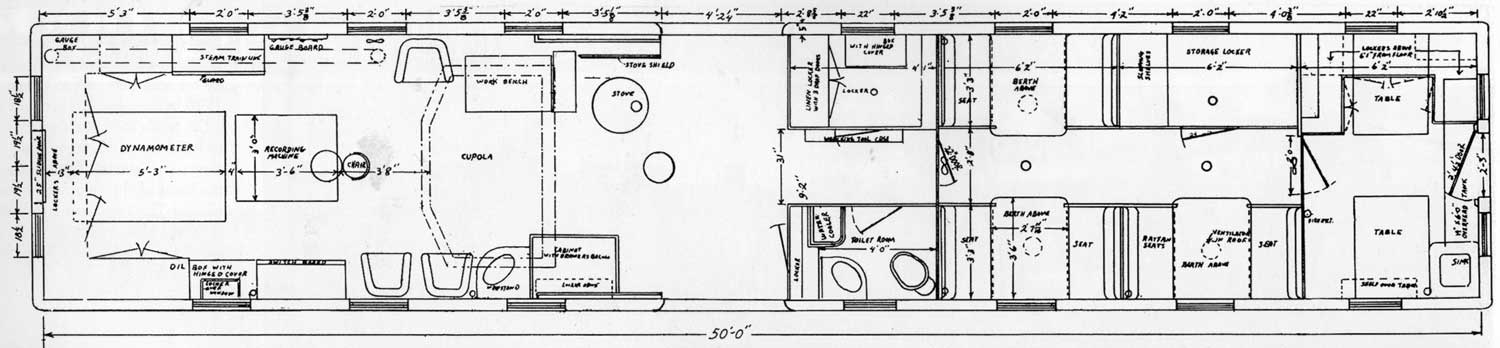
I have not seen any drawing of the underbody. I am confident there were all sorts of linkages for the instrumentation, but all that I have been able to deduce comes from the above photos. The trucks are rather crude. If anyone knows of a suitable replacement, let us know. Other: An elevation drawing of the car (1917) from the Richard Sholz collection is is in the Society Business car book as in a floor plan (1944) for your assistance. The elevation leaves off many details. Decals: several people report making decals for their friends. The old Champ PH-8 set included "DYNAMOMETER." I have seen them in two different shades of gold. Railgraphics generic set #103, Caboose and Work Equipment, also has "DYNAMOMETER." If anyone has more details, this is a website in progress, so please add your details. |


